Saturday, April 19, 2014

Earth Friendly Fair in Cambridge, MN


I'll be presenting at the 4th Annual Earth Friendly Fair this Saturday at the Anoka-Ramsey Community College.  I pulled together some of the best parts of previous presentations and added in some new material to make the content more fun for the drop-in-and-out crowd that I expect to see there.

For the content of the presentation click the slide to the right.  You're missing all of my witty commentary and charm but there it is if you are interested.

We had planned on having a live bee swarm demonstration but with the 18" snowfall that came a few days prior the bee shipment was delayed and this presentation will be without bees.  I was even considering a beard of bees!

Saturday, April 12, 2014

How to Move Equipment With a Car

It can be challenging to be a beekeeper without a proper truck.  I've managed with a Corolla and Prius and I've actually been impressed with how much I can fit in the Corolla.

My biggest challenge has been avoiding getting wax, honey, and propolis all over the truck and seats.  Usually I put down some newspaper to take care of that problem and it has worked pretty well.

Surprisingly enough the back seat is where I get most of my cargo space from, the trunk can only fit a couple of boxes given their measurements.  They fit much better in the back seat, allowing up to six boxes compared to the two in the trunk.  Although a truck would be quite handy I think I would instead go with a simple trailer.  That would also help quite a bit the next time I need to move bees to another location.

Saturday, August 17, 2013

Bee-mergency! Bee Vacuum Back in Action!

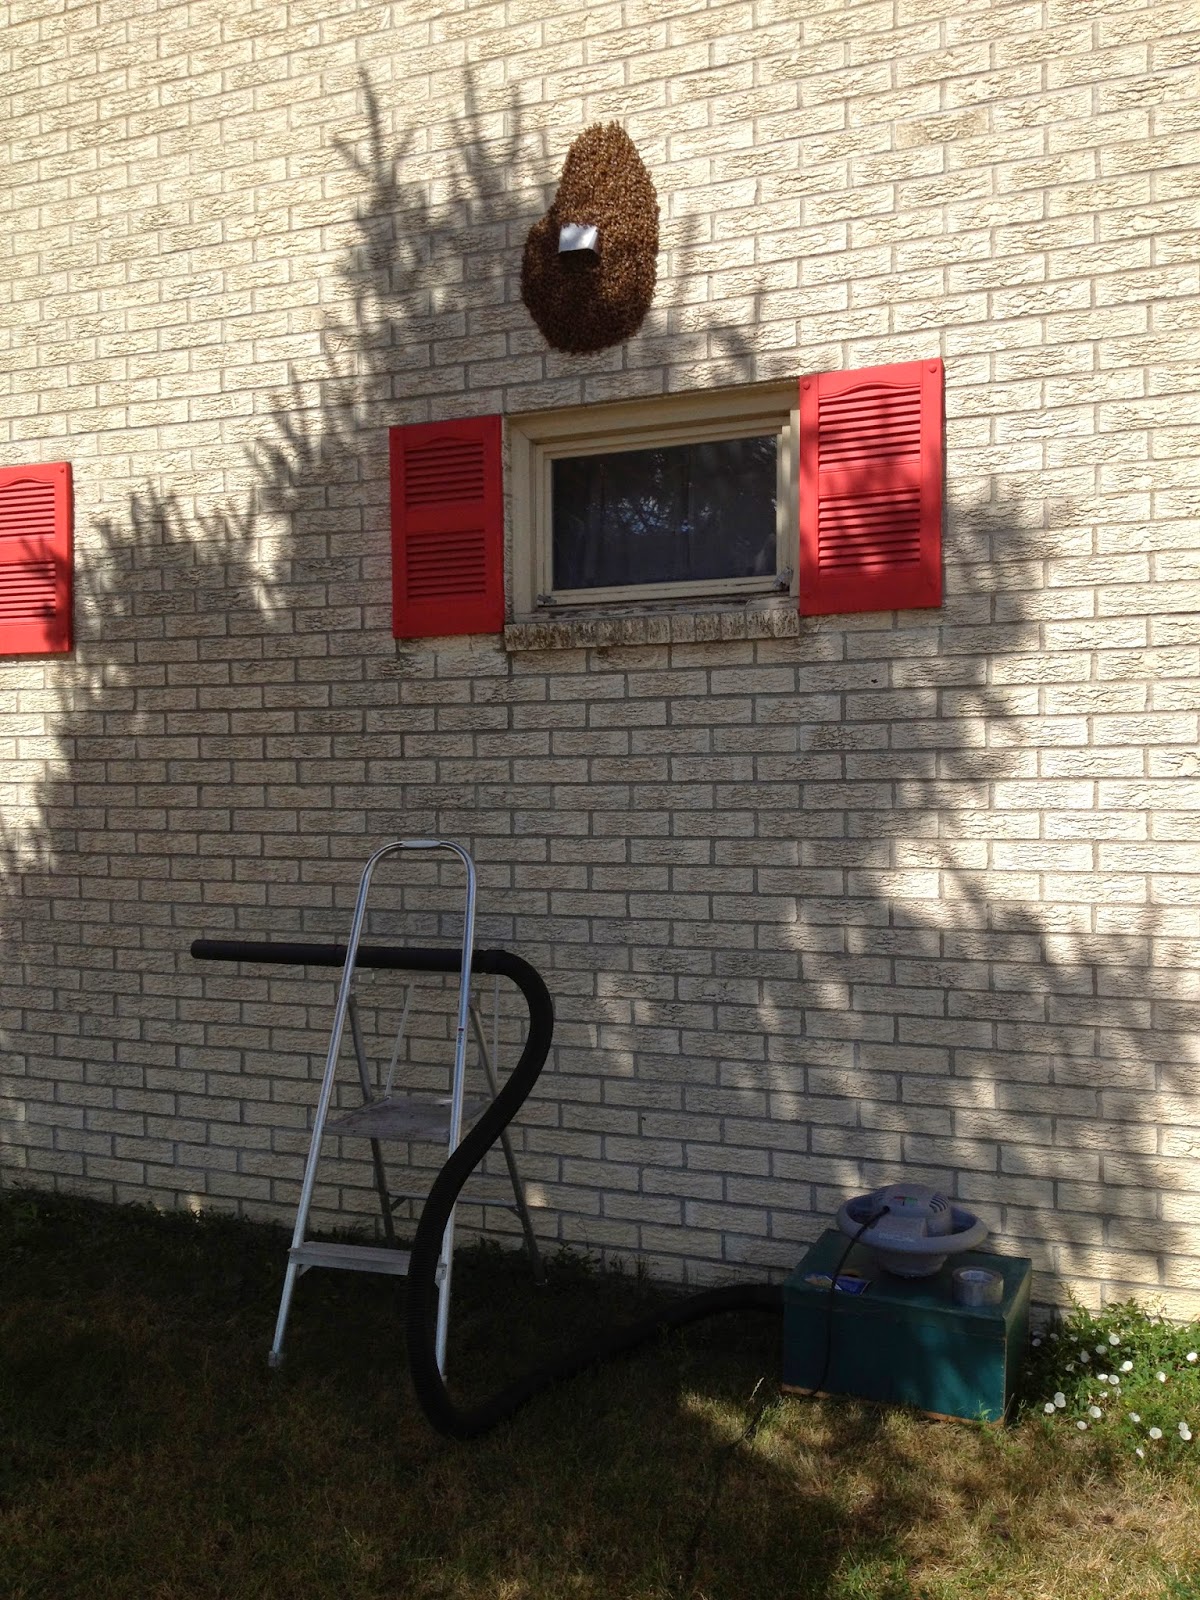
My earlier encounter with the police ended up going much better than I thought at the time.  As a result I got a call to collect a swarm that had settled on the side of a local motel.  Eager to stay in the good graces of local law enforcement I quickly agreed packed up my bee vacuum and drove on over.

The bees had settled on the side of the building as described but they were actually entering a dryer vent!  I was hoping they weren't setting up a home in there, which was likely as they had only been there a few hours.  The small crowd that had gathered was quite impressed at my bravery by walking right up to the swarm in my T-shirt and shorts.  I inspected the situation, set up my ladder, and started vacuuming the bees.

Starting at the bottom of the swarm I moved back and forth and after only about ten minutes I had collected the entire swarm in the bee canister in the vacuum.  The two police officers that were there thanked me for coming out and taking care of the bees and I thanked them for calling me.

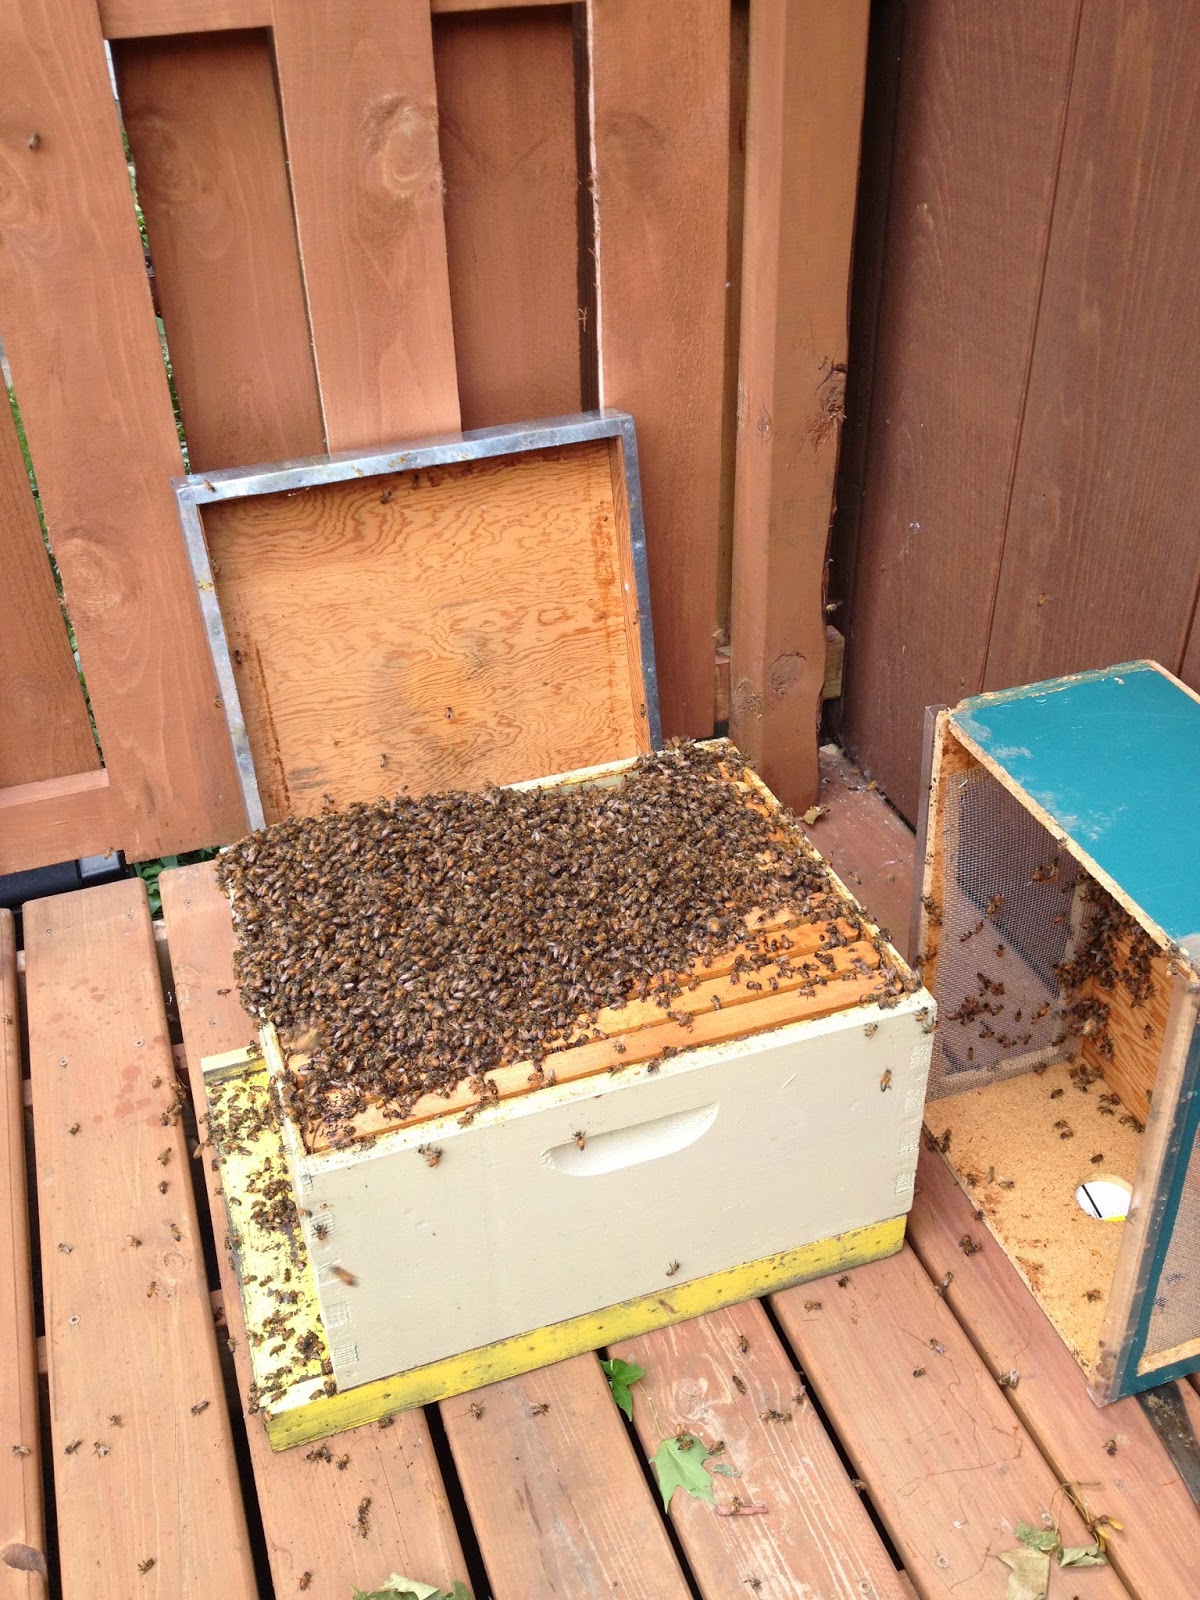
I drove the bees back to my house where I had some empty equipment waiting for them.  I noticed that in my haste to please the crowd and the police I had the vacuum set a little stronger than I should have.  The bee canister had more than a few dead bees, most of them done in by a separation of abdomen from thorax!  I hoped the queen was collected and survived but I didn't bother looking for her.  A swarm of this size this late in the year doesn't have much of a chance of survival.  I'll give them a fair shot but I'm not expecting much.

UPDATE: I got a second call from the police that the bees had returned.  I explained that some of the bees would linger for a bit but eventually disperse.  I investigated and decided to leave the few bees that were there alone.  They did disperse although given how long they stayed I'm not sure they found their way back home.


Thursday, July 26, 2012

Moving Bees - What Not to Do

As you may have read in my earlier post it is very hard to take your bees with you when you move.  If I had known how difficult it really was I wouldn't have done what I have just done.

I needed to relocate or give away all of my bees. Having seven hives I manages to give away two and I then proceeded to rent a U-Haul trailer to move the five I planned to keep.  I looked up the requirements to move bees like I was planning and I needed a certificate of health from the state I was leaving filed with the state I was moving to.  For a modest fee I was able to get a bee inspector out to my hives and before long all of my paperwork was in order.  To prepare for the move I harvested Honey from the hives in mid-Summer to try and get the weight down but the bees just filled them back up with honey from the plentiful flowers in the neighborhood.

I knew from talking to others and doing some internet research that bees generate a lot of heat when being moved.  The professionals throw nets over hives and move them in open containers like flat bed semi trailers.  I only had about three hours on the road so I decided to risk using a closed container.  I decided to risk further disaster by closing up the hives to prevent them from flying inside of the trailer!  Knowing the bees were about to get quite hot I stopped by my local Wal-mart and filled a shopping cart full of ice, about 250 lbs of it.  I got some strange looks as I checked out but it was nothing compared to the looks I got when I suited up in my full body beekeeping suit, opened the back of the U-Haul trailer, and started throwing bags of ice into it!

When I arrived at my destination I opened the back to see what the status was and was greeted with a cloud of angry bees.  For better or worse the hives hadn't stayed sealed and there were many angry bees waiting to express their feelings.  I warned the nearby homeowners that there would be some angry bees in the air shortly and proceeded to suit up and get to work.

I had five hives to move and not the best set up to do it.  I had an appliance dolly for moving the hives, the heaviest of which was about 350 lbs!  I also had some planks of wood to work as a ramp which worked, but just barely.  I nearly lost a hive over the side as the wood shifted at the wrong time.

A neighbor got stung early in the ordeal and a few houses down some children were enjoying tormenting their mother by sneaking out into the yard and pretending to be attacked by bees.  I did my best to ignore this and get the bees off of the trailer as quickly as possible.  I was happy to find that only one hive showed any signs of overheating.  I was not happy that there was a police car circling the block as I was working.  The homeowner from the property I was putting the bees on walked over to talk with the officer and not long after I finished unloading the trailer.  I still had to move the hives to their resting location and open the hives but I was eager to move the truck to put an end to the scene.  I closed the trailer, got in the truck, and started to drive off.  The police car followed me (of course) so I pulled myself over once we were out of sight of the bees.  The officer was smiling and in a good mood but said he wasn't sure keeping bees was allowed.  I had checked ordinances and I knew it was allowed but I thanked him for his assistance and we parted ways.

I returned to the bees and finished moving them, ending the journey mentally and physically exhausted.  In hindsight I should have gotten rid of the bees, moved the empty boxes, and started with new packages in the Spring.

The best thing I can say about the ordeal is that I'm glad I did it so I can recommend from experience that others do not do this.

Monday, July 9, 2012

A swarm in July

When July 1st comes around I think to myself "Phew, I'm glad swarm season is over and I don't have to worry about that anymore."  But unfortunately the bees don't always do what they're supposed to!  I got home around 6pm and went to the back yard to water some grass that was on death's door and found this gigantic swarm hanging in our maple tree.

It was high enough that I couldn't reach it with a step ladder and it was far enough from the trunk that an extension ladder wasn't going to work so I did something I probably shouldn't have.  I got my mother-in-law to help me move a table to the back yard that I put the ladder on top of.  And to make it extra dangerous it was a two legged table!  It was a bit wobbly, particularly when I sawed through the branch and picked up the weight of the swarm, but luckily no bees or humans fell to their death.

I had to do everything I could to keep this swarm because  it came from my best hive.  The bees kept their mite population in check through the Fall of 2011, they overwintered the best into 2012, they didn't swarm in the spring despite being asked to draw out foundation, and they produced a large excess of honey for me to harvest.  Since all of those characteristics came from the genetics of the queen who was now in this swarm I didn't want them to fly away despite my already having more hives then I want to have.

I was able to trim a small branch from the tree and carry the swarm over to the boxes I intended them to live in for the next week.  Next week I will move them away from my neighbor's fence and off to another apiary I'm establishing.  I took the frames out of the top box, grabbed the branch on either side of the swarm, and gave it a good shake into the box.  As I did I was reminded how NICE workers are when they are in a natural swarm like this.  A few bees landed on my pants and arms but they did nothing but nasanov like crazy as I picked them up one by one between thumb and forefinger and placed them back in their new home.

The old rhyme goes "A swarm in July isn't worth a fly" but I'm sure this one will overwinter well on their own merits despite the late swarm.


Saturday, June 30, 2012

Bee Vacuum

One of the problems with urban beekeeping is that the bees do really well.  What I mean by that is that a new beekeeper who gets a package in the Spring is almost assuredly going to have a hive that is so strong it will swarm in the Summer.

This nice spruce tree is in the back yard of one of the boys I'm mentoring this year.  It's a healthy tree and you can tell that... wait.. something doesn't look quite right with that tree.  Lets take a closer look.

The tree is full of bees!  Well, that's nothing I haven't dealt with before.  Not having the benefit of seeing the particulars we can now see in these photos I instructed them to place a box under the branch the swarm was on and shake them into the box.  When they replied that it wasn't possible to do that I suggested trimming the branch or branches the bees were on and taking the branches to the boxes.  I didn't realize the tree was so small and removing the branches with the bees on them would so horribly disfigure such a nice little tree.

After attempting to brush the swarm into boxes, gather bees by the bucket full and bail them into the box, and after getting stung more than a few times they gave up as the sun was setting.  I assured them that the swarm wouldn't leave until the sun was up and they responded that it sure would be nice to have one of those bee vacuums they heard about on the internet.

I had also heard about bee vacuums and I had almost built one last year.  Beesource has an excellent discussion forum and I've found it to be a great resource for build-it-yourself plans, including this bee vacuum.  When I say I "almost built" a bee vacuum I mean that I looked at the plans and thought about making one but hadn't actually done anything.  By this point it was around 8pm and I had decided to make that vacuum.
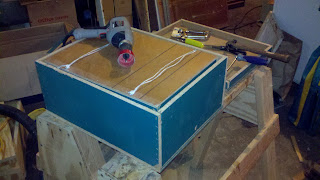


The first step was to find material to use.  I saw half of an old green ping pong table that was serving as a workbench and some wood paneling leaning against the wall in the garage.  Perfect!  I didn't have the various hinges and latches that I would need but I figured that would work itself out after I started getting things together. I got out a circular saw and a drywall T square and started making rectangles.  Once I had my 16 rectangles of various sizes I drilled and sawed out two of them and put #8 hardware cloth over the opening.  I then proceeded to assemble the rectangles as the plans showed.
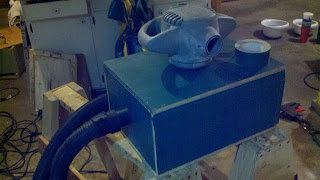
I didn't have handles for the inner box so I attached some twine in their place.  I didn't have hinges for the lid so I just used some ten year old "100 mile an hour" tape that I still had sitting around in place of the hinge and it seemed to work good enough.  I then proceeded to disassemble my vacuum and stick it to the top of the lid, drilling a total of four big holes in the boxes.  By 2am I was ready for a test of the newly assembled bee vacuum!  I nervously switched the vacuum on and checked the suction at the end of the hose.  It really sucked.  Success!  I reinforced a few of the seams with some more tape and went to bed around 3am, planning to drive over to this swarm in the morning before they flew off.

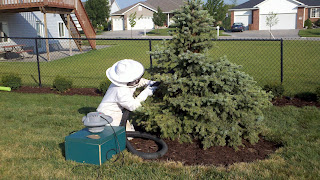
I was so excited to give this curiosity a try I had no trouble getting up in time for a 7:30 meetup at the swarm.  I exercised amazing restraint in calmly handing over my precious creation to my student for its first field test.  Even I was surprised at how calm the bees remained as they were sucked up the hose!

We had a total of four people watching the bee vacuum in action (three of them with cameras) and everyone felt quite safe despite the thousands of venomous insects being forced through a vacuum nearby.

It was hard to believe that these were the same bees that had delivered a total of seven stings only a handful of hours before.  As my student worked his way around the tree I adjusted the vacuum throttle (a very necessary part of the vacuum) and before long there weren't many bees left in the tree.  It soon became apparent that the queen had been sucked away because the few workers who were left began taking to the air in search of their now missing swarm.  The vacuuming of the swarm went quite well, the only problem came after the vacuum was shut off and some of my 10 year old tape started to come loose.  A few bees began to emerge from the box but I was able to re-stick the tape and only a few bees were lost as a result.
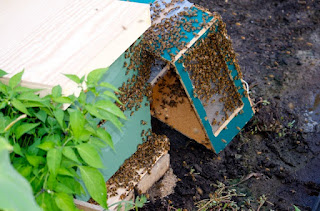
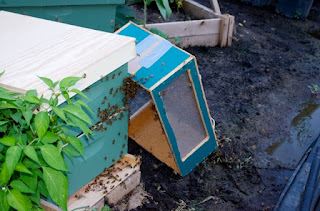
Once the bees were safely stowed in the recently assembled bee vacuum box my student had time to assemble the equipment they recently purchased to hive the swarm.  Two days later the bees were taken out of the basement and some of the tape was removed to allow the bees to exit the holding box and enter their new home.  The original plan calls for a sliding rail to hold the box together but again I compromised in the interest of speed and used tape that had reached the end of its lifespan.


I wasn't present for the re-boxing of the bees but from the pictures they shared it looks like it didn't go perfectly but eventually all of the bees moved from the holding box into the hive.  SUCCESS!

UPDATE:  Unfortunately the bees didn't stay in the new hive and instead flew away not long after the transfer.  My diagnosis is that the hive was disturbed too much after being transferred to the hive.  The box was opened frequently as the hive was adjusted to make a perfect home for the swarm but unfortunately what they really needed was peace and quiet after a long journey involving a bee vacuum.


Friday, April 20, 2012

An Early Swarm


I've heard it so many times I have no idea where it originated but common wisdom is that:
"A swarm in May is worth a load of hay.
A swarm in June is worth a silver spoon.
A swarm in July isn't worth a fly."

My addition:
"A swarm in April will probably catch a beekeeper by surprise."

This is the earliest swarm I've ever seen, April 20th. About 2 lbs of bees and we found them at 4pm in the tree. With this I am officially out of bottom boards and covers. I also have more hives than I want to have with 5 hives that need splitting (or something!) or they will likely be up in the trees too.

Tuesday, February 28, 2012

It must be spring already.

One of the great things about having an observation hive is that you get a peek into what's going on inside outdoor hives when it is too cold to do a full inspection.

On February 26th I noticed this bee on the right doing a waggle dance. She thought she had found some pollen and was telling the other bees where it was. When there aren't any flowers in bloom bees will collect dust from odd places and treat it like pollen. I've seen them collecting sawdust and I've heard stories of them collecting most any dust.

As I was trying to determine what the substance is that the bee was treating like pollen my wife presented me with this wonderful picture on the left! The stuff the bee collected was actually pollen after all. Those bees really do know what they're doing after all.
And apparently Spring for a bee can begin as early as February 26th in Nebraska.

I was told that this flower is a crocus and they can bloom very early in the year, often through snow. I've not heard that they are an important source of pollen or nectar for bees but from what I'm seeing this year this is the pollen that will allow my observation hive to start rearing brood as they did not have any stored for the winter.

I have quite a few maple trees in my area that may be blooming already but when a maple blooms you won't notice it unless you are specifically looking for that. There's no missing a purple flower like this one as it pushes its way up through partly frozen ground.


Wednesday, November 16, 2011

Finding the queen

When working with a hive one of the things that a beekeeper often has to do is to find the queen bee. Even with a queen excluder limiting the queen to the bottom two boxes (if you use them) you have twenty frames of bees to search for a single queen. This is something that can be incredibly difficult for a new beekeeper but with experience you learn a few tricks. Here they are:

1) The queen will be near the youngest bees.

2) The queen will either be:
Moving in a straight line, plowing through other bees
or
Staying in one place with a circle of attendants around her

3) The queen has a longer and pointier abdomen than the other bees

These three tricks might not seem like much but I've found they are the key to locating the queen in a hive when applied in this order. Most new beekeepers are only told #3, what the queen looks like. I've found that this information is not sufficient and in fact on its own makes the task of finding the queen more difficult than having no information at all! If you have two bees side by side and want to know which one is the queen then yes, look for the longer abdomen and the hairless thorax etc.

Applying #1:

If you have a hive of bees you need to find the frame a queen is on. This is where #1 comes in, in the hive you have a few frames with fresh eggs on it (a bee is an egg for 3 days) and this is where the queen will be located since she is the one who lays these eggs. It should be obvious where the brood is so start there and move through the box one frame at a time. You will see the brood getting younger and younger, from capped to uncapped and from larger larva to smaller. You will come to the eggs fairly quickly, the eggs who are near the small larvae are the 3 day old eggs. I find this part very interesting, this means that this is where the queen was three days ago! You're on her trail, tracking her down now.

Continuing in that same direction you will see more eggs, younger and younger. If you reach the end of the brood nest the queen probably went up or down a box so continue your search there. Before long you will come to a frame that has eggs and empty cells and possibly emerging brood. This is the frame you are most likely to find the queen on, good work!

Applying #2:

Now that you have a frame (or a couple of frames) that is likely to have the queen you can apply the next trick. There are probably about 1,000 bees on the single side of the frame you are looking at and there might be one queen among them. If she has been marked with paint or is an Italian queen with a bright gold abdomen you can probably spot her right away but if you like to keep unmarked Carniolan queens like I do you'll need to take a closer look. It is tempting to start looking at individual bees to find the one that looks like a queen but I've found it is easier to instead look for her behavior. I most frequently find the queen moving.

Bees rarely sit still when there's work to do but they don't usually run all over either. The bees are probably milling about in small circles, almost like they are trying to look busy without actually going anywhere. The queen on the other hand covers significant distance when she is moving. She also tends to plow through other bees instead of finding a careful way around congested areas. I've never seen a worker or drone doing this so if you spot this behavior you've found your queen.

If the queen isn't moving like this she's still easy to find if you know what to look for. Whether she is laying, eating, being cleaned, or just collecting her thoughts if the queen isn't moving quickly she will be the center bullseye of this circle as you can see in the image at the top of this page. The bees in this circle are often called the queen's attendants although I've not seen these attendants actually follow the queen much. They seem to come and go rather than follow the queen and attend to her individually.

Applying #3:

Now that you've found the queen (or rather a bee you think is the queen) you can apply #3. The characteristics of a queen are great for determining if an individual is a queen and they are quite simple when used in the comparison of two bees. Which one has an abdomen so long it isn't covered by her wings? That's the queen, although some workers have longer abdomens but not nearly as long as a queen's. Which one has a hairless thorax (the area where the wings meet the body)? That's the queen, although old workers also have hairless thoraxes.

Now that you've found the queen you can get on with whatever work you were doing that required finding the queen. If you had to find the queen it is probably important that you know where she is from here on out for your task. I've made the mistake a few times of finding the queen and then losing here again at which point I usually give up and close the hive. Finding a queen after she is already disturbed is much harder and you can't apply the 3 tricks above as reliably. Because of that you may want to put the queen in a little queen cage like the one pictured here. I usually do something simpler and just set the frame with the queen someplace safe and out of the way while I'm doing the real work that required finding the queen.

Friday, September 30, 2011

The hive is under attack!

As the weather gets colder flowers are harder to find and bees start looking for other sources of food for their winter stores. Unfortunately one source they look for is another beehive. Italian bees (Apis mellifera ligustica) are particularly good at this which means they are particularly hard to keep in the Fall.

Smaller hives frequently are attacked in this way, the workers who are old enough to try and stop the invaders are killed and the workers who are too young hide with the queen while all of their honey is taken away. Once this starts it is very hard to stop. Unfortunately my new observation hive is a small hive and I have some Italian bees in the back yard. One morning I noticed the observation hive was particularly noisy, on closer inspection there were quite a few dead bees in the hive and quite a few bees running from the entrance to the top of the hive and chewing open wax to eat the honey inside.

I acted quickly and closed off the entrance to the hive, trapping the invaders inside. Not long after the air outside the hive was filled with bees carrying pollen on their legs trying to get inside. The pollen marked them as bees who belonged in the hive so I opened it up to let them in and then closed it again. The hive soon was very noisy and it remained that way for the two days I left the hive closed. I left it closed for that long to try and convert the invaders to defenders, to make them think of this hive as their new home.

In the end it worked OK but not perfectly. I did save the hive from being killed but it was my fault this happened in the first place. I had put the equipment I used to extract honey this year in the back yard for the bees to clean up, they do a good job of licking up honey on equipment. Unfortunately it also puts the bees in the robbing mood, since they already found some honey to eat hidden away they learn to start searching for more opportunities. Before this I was a fan of open feeding in the fall but I'm not so sure anymore.

Thursday, September 22, 2011

Kill all the males!

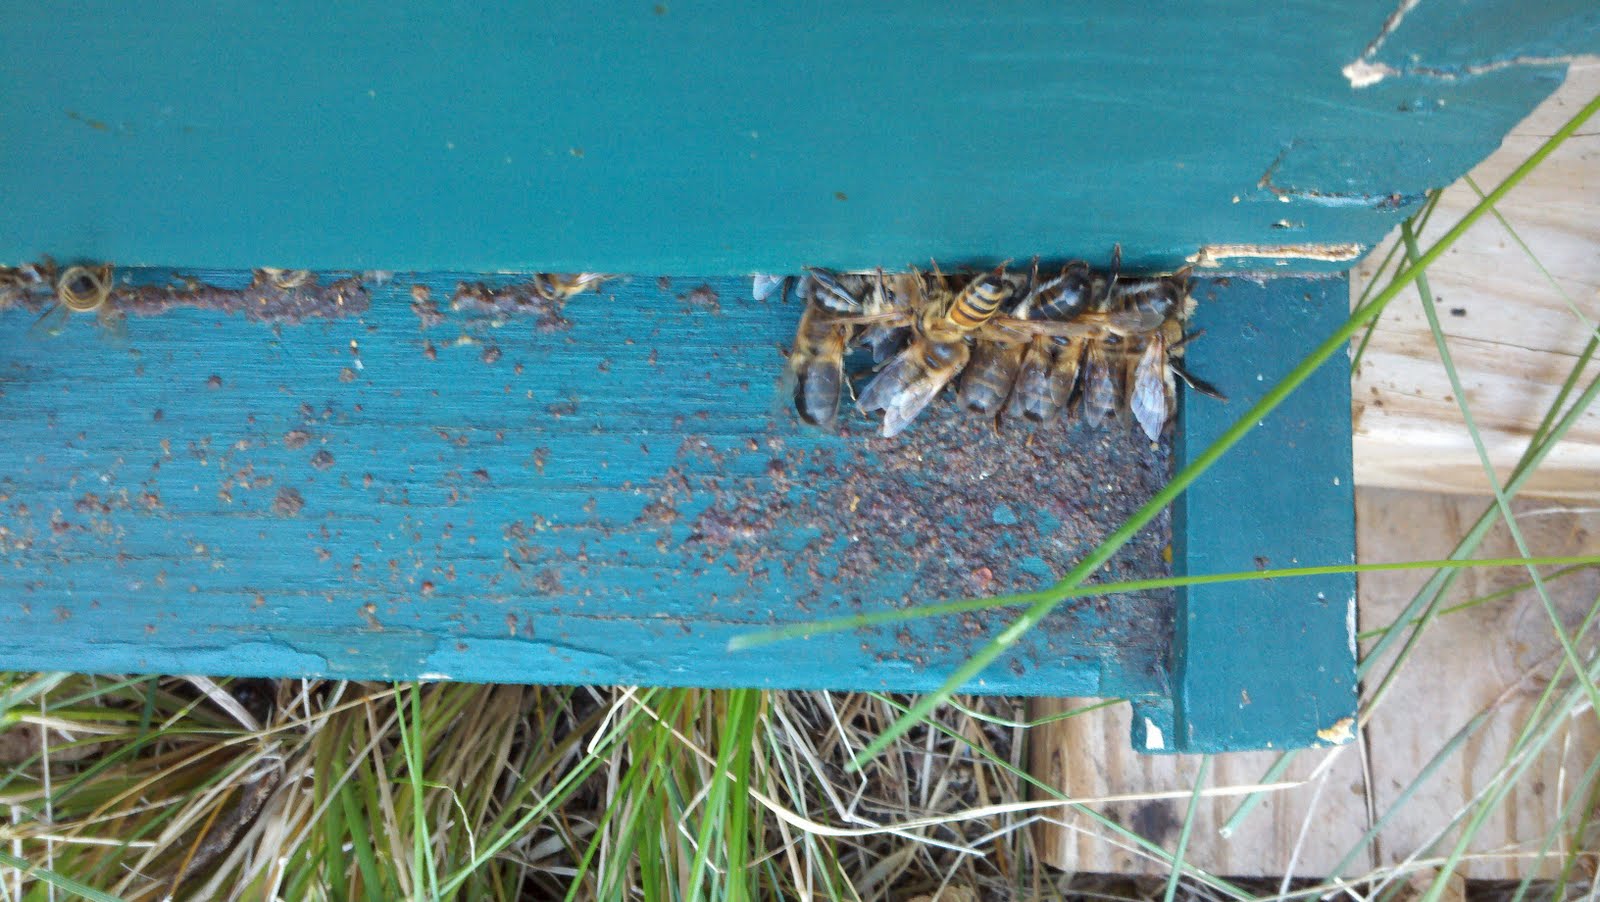
As the weather starts to turn cold something subtle changes in a beehive. The workers stop feeding the drones and they become less tolerant of their presence in general. The more cold weather you have the farther this goes. By the time you get your first frost the workers can be seen dragging drones out of the hive by their wings or legs! Something I see every year is what you see pictured here: workers refusing to let drones into the hive in the evening. By morning the drones are dead in the grass from exposure.

I saw something I haven't seen before last week, I saw the workers removing drone brood! When the weather is warm a hive keeps male bees around so they can mate with virgin queens from other hives but when the weather gets cold there are no queens to mate with so the male bees only consume resources and don't benefit their hive anymore. Since it got cold quickly the queen was still producing young male bees when the hive decided to get rid of them. This mean that the young males had to go too, including the two you see in the picture to the right. Healthy young bees are white like what you see here, although these two won't be healthy for long. The workers are biting them and will soon carry the larva away and drop them in the grass.

Friday, September 16, 2011

It's hard to move with a beehive.

Good news! The friend who invited me to bring an observation hive to the farmer's market sold her house, something that isn't easy to do with the way things are now. The bad news is that she won't be in town anymore and she can't take her bees with her! She asked if I would take the hive and I gladly accepted, since I just lost a hive I had an empty spot in the yard and one slot free according to city ordnance.

I've moved hives before but never one this large. I took some empty equipment and made sure I could fit it in the car somehow. The hive would be 2 deeps and 1 medium so I stacked up 4 mediums with a top and bottom to see if it would fit. Nope! As you can see on the left the stack is about 3" too tall. At least I can close the back most of the way with it in there. Well, at least more than half way.

A beehive is best moved at night. Since bees navigate by sunlight when the sun is down they are inside the hive. If you move a hive during the day all of the foragers are out working and return home to a surprise, no home! This late in the year it would be hard for a hive to recover from losing their foragers like that so I decided to move at night. A head lamp is a must in that situation so you can see what you're doing but still use both hands. The trouble is that bees, like many insects, are attracted to bright lights like that. To keep bees from flying towards my head as I worked I use a red light. Bees can't see red very well (some reds are invisible to them!) it helps keep things calm when I'm working. In the red photo to the right you can see the magic of moving a hive: stuff a cloth in the openings and put some tape over it. If you did it right you get to drive to the new location without bees flying around in your car. Bonus!

My friend helped me load the bees into the car which was good because the hive probably weighs about 150 lbs. Unfortunately (and fortunately!) this hive was fancier than the ones I'm used to. It has a nice peaked copper roof which was hitting directly on the glass of my car's rear door! Also, being another few inches taller, the door wasn't closing much at all. Turing it sideways helped and I could get the back closed far enough so a bungee cord would reach. Good enough! Luckily I only had about a mile to drive (yes, I broke that beekeeping rule) and there wasn't much traffic at 10pm. My friend said goodbye to her bees and I drove the bees to their new home, learning that an open hatch causes a powerful wind tunnel as you drive along with your windows open. I got the bees to my house and then unloaded them. I got the job done but there were a few close calls! I'll definitely add this to the list of things I shouldn't have done alone.

I moved the bees to their new spot in the yard and let them sit for about 30 minutes before opening the entrance. It was good I waited as they got a little upset while they got bumped around during the move but it was also good I didn't wait too long, as soon as I did open the hive the workers instantly began fanning the entrance to cool the hive off. When bees get bumped around like that they end up creating quite a bit of heat and the hive was hot! If I had left them closed until morning like I was considering the hive probably wouldn't have survived. Close call! On the right you can see the six hives in my back yard. Try and count them if you want, one is a little hard to find. The new hive doesn't quite fit in but I'm very glad to have it. I'll give it a good inspection soon to make sure it doesn't have any nasty disease and to ensure they are prepared for the coming winter. At only 150 lbs the hive might not have enough honey and we're on our last round of flowers for the year.

Friday, September 9, 2011

Two hives lost, one hive gained.

I decided to try to overwinter small hives this year to avoid having to buy queens and bees in the spring. If it's done right I'm putting in a little extra work but saving $100 in the Spring. I planned to have two small hives on top of two larger hives for the winter with a double screen board between them. I made the splits in July but made some mistakes. I noticed some guilty bees going into one of the small hives so I opened it up to investigate. What I saw was the worst case of varroa infestation I've ever seen! The brood frame you see on the left is what I found, along with a small cluster of SICK bees and a queen. I didn't check varroa levels before I made the split so this small hive was left with way more mites than they could deal with. I'd normally replace the queen that caused such a bad result but this queen wasn't the one to blame, she inherited the problem from the split I made.

If you look at this picture closely you can see a varroa mite stuck to the top of the young bee in the center of the image. Young bees are white (when healthy) so the dark red mite stands out quite well. Also in this close-up you can see the perforated cappings of the brood cells, that is always a sign that something bad is going on. What bothers me a little more than it should is the dead young bees. You can see a few cells where a bee is just poking its head out of the cell, this is a young bee who just emerged from her cocoon and is expecting to be greeted by her sisters as she pulls herself out and into the hive. Instead these bees were met with a ghost town of death and destruction. There were a lot of young bees like this who didn't have the strength to pull themselves out of their cell because of the varroa that fed on them as larva.

The sure sign that this was a failure due to varroa was the deformed bees that were alive. The bees that were able to become adults were so sickly even an untrained eye can tell that there is something very wrong with that bee. In this picture you can see two bees, one is normal and healthy (from another hive, entering this one to investigate all of the unguarded honey) and the other is one of the bees that were clustered around the queen and covered with mites. Normally even in a bad varroa infestation it is difficult to find a mite on an adult bee but in this case every adult bee had multiple mites on them. The queen was running for her life and quit hard to catch!

It was still July and I decided I had time left in the year to make a new split for this queen to start a hive with. I went into one of my strongest hives with plans to remove some brood (WITHOUT varroa!) and try again. Oddly though the hive I opened had no brood of any kind, just signs of a failed queen replacement. I saw partial queen cells in the hive but still no queen. With no brood it was possible that there was a young queen somewhere who just wasn't laying yet (or perhaps she was out mating) but given how the bees were acting I was pretty sure they lost their queen a few weeks ago and weren't able to make a new one. That makes a second failed hive!

The good news is that I had a queen with no hive and a hive with no queen. I put the queen into a queen cage along with two healthy workers from her old hive (without any varroa on them) and placed the queen cage in the big hive with some marshmallow blocking the opening of the queen cage. I closed the hive up and planned to come back in 4 days to check on her. I opened the hive up on Thursday and the queen cage was empty, the workers had released the queen already. The frames next to the queen cage were filled with eggs so I knew the queen was accepted and well on her way to saving the hive and herself.

I also realized what a pain it is to have a hive on top of another hive, the hive that I added this queen to was one that had a small nucleus hive on top of it. I had to move the little hive to work on the big one which caused a lot of confused bees to circle and some to go in the wrong hive which caused the bees to be a little more defensive than I'd like them to be. I suspected the double screened board was the cause of the queen loss (the bees below smelled the one above so they didn't replace their queen correctly when she needed to be replaced) so I replaced the double screen board with a regular outer cover and bottom board making two separate hives. Unfortunately I can't move the little hive to a new location because all of the foragers (adults who leave the hive) wouldn't move with the hive and the little hive can't spare that population loss this late in the year.

Monday, August 22, 2011

Observation Hive - Summary

On Saturday it had been four days since the bees had been able to fly other than the few heroic bees who were able to navigate the tubing in the basement. The hive was getting pretty frantic with bees who needed to relieve themselves (they don't do that in the hive if at all possible) so I gave up on my basement plan and temporarily moved the hive outside so they would have a few hours of flight before the farmer's market on Sunday. I kept the hive near where the entrance was previously so the bees would be able to find their way home if they had previously learned the other location. The ladder with the burlap is to shade the hive from the direct sunlight to prevent overheating.

The farmer's market went great. The bees were the stars of the whole market and I got to spend five hours talking about honeybees. I also pointed people to the local beekeeping courses as well as the excellent scholarship for youth ages 12-17. I got the bees there in an interesting way, I basically wedged the hive up against some seats and kept it stationary by packing cardboard boxes in behind it. It worked well except for the one turn on the way back home when the hive slid off of the door rest and down a little too abruptly.

When I got back home I drilled a hole in our bedroom wall (carefully of course) and put the hive in its new place with the wife's permission. The brown dust is sawdust from the drilling, not the bees. The bees immediately flew out (and relieved themselves) as it had been many days since they had been outside of the hive. Within an hour they were feeling much better and I was also much happier.

By Monday the bees were collecting pollen, something I've seen many times before but I've never been able to appreciate it fully until seeing it up close. One of these bees is not like the other, one of these bees is not the same... That bright yellow is pollen! Go bees go!

To help others out there who are thinking of doing this here's what I did wrong:

1) Keep it straight. If you use clear tubing to connect the hive to the outdoors make sure the bees always go towards the light to get outside and away from the light to go home. Any bends or turns will prevent the bees from finding their way out. Even if you don't use clear tubing a straight path will be better.

2) Don't be tricky with your bee hole. If you, for example, drill out a few inches and then down a few inches to connect the bees to the outdoors with a 90° turn they will have trouble navigating the turn. They won't be able to see the sunlight from the tunnel and will have difficulty knowing which way to go.

3) Size does matter. You can go as small as 3/4" inner diameter for the tube but when the workers have to haul out a dead drone they'll get the tube clogged pretty easily. At least 1" inner diameter is what I'd recommend.

4) Don't fight an uphill battle. You can have your bees climb up or down on their way between the hive and the outdoors but if at all possible keep the slope less than 30° or so and avoid having the bees go uphill on the way out. They have to carry their trash out that way and frequently their trash weighs more than the bee carrying it! A level path is best but uphill when heading out is to be avoided.

5) Bees Buzz. If you're going to do something crazy like put a beehive in your bedroom be prepared for some loud buzzing at odd times, perhaps when you are trying to sleep. These sounds will reduce in volume and frequency as the bees adjust to their new home but it is unlikely they will ever remain completely quiet.